FREQUENTLY ASKED QUESTIONS
ART PROCESS
How do you create canvas giclee prints?
Canvas prints are created from my original oil paintings on Belgian linen. The Belgian linen has a high textural quality and this is visible on your high quality textured gallery quality 390gsm, canvas that will adorn your walls. Professionally photographed to capture every detail, one can see the brush strokes and layering of the original oil paints. The inks are archival pigment based, using state of the art printer technology.
Why are your prints different sizes to most artists?
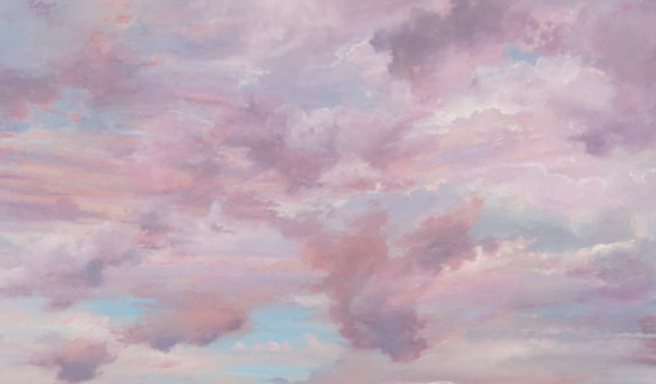
Michelle paints square, portrait, and landscapes. Each painting is unique and created from imagination, and take on a life of their own, whether they become a large or small painting is unknown at the start of the creative process. Different dimensions means Michelle can give the painting the individual "space it needs to breathe". Michelle chooses the part or whole of the painting that she believes to be “perfect” capturing the dynamic nature of the scene. Sometimes, I may divide a canvas it into two, as it may not evolve into one painting. Some big paintings do not translate to smaller sizes as the clouds become too compressed. Small paintings lose their magic if they are created too large. I control carefully, what image suits what size of canvas so that it’s maximum beauty can be appreciated and the “wow" factor centre stage.
Where is your studio?
Michelle’s art studio is at One Plus2 Artist Studios, 6 Mansfield Street, Rozelle, Sydney, five minutes from the CBD.
RECEIVING MY CANVAS
How long does it take to custom make my artwork?
As soon as you order, our bespoke artisan printers start the printing process, custom making it to your specific requirements.Unframed canvas ready to be shipped 1 - 2 weeksFramed and stretched canvasses 2 - 3 weeks.
How long does it take for receive my artwork once it has been custom made?
In Australia it takes 2-7 business days. Overseas it takes 5 - 10 business days.
Will I receive a tracking number?
Yes you will receive a tracking number once it is assigned to our courier. And by clicking on the tracking number will be able to follow the tracking. You will also be able to contact them if needed.
What will I pay for shipping if my order is under $700 in Australia
Australia wide shipping is $40.
Do you ship outside of Australia?
We ship only canvas prints outside of Australia.
What will I pay for shipping of PRINTS ONLY to Europe, Africa, Asia, America?
Any other country packing and shipping is AUD $150, and is added at checkout.
Do you ship framed/unframed canvasses outside of Australia
Only on request. Please contact our office for a quote?
How do I hang my artwork?
Welcome! You’re just a few easy steps away from transforming your space into a peaceful, tranquil haven. Hanging your artwork will not only showcase your unique style but will make your room feel more complete and welcoming. Follow these simple instructions, and in no time, you’ll have your art hanging like a professional. Get ready to impress everyone who enters with a beautifully styled room!
Key Tips:
Eye Level: The center of the artwork should be at eye level, typically 145-150 cm from the floor.
Above Furniture: If hanging above furniture, ensure the bottom of the artwork is about 15-25 cm above the furniture.
Materials You’ll Need:
Measuring tape
Pencil (for marking)
Level (to make sure your artwork is straight)
Drill with masonry bit (for plaster/brick/concrete) or standard bit (for plasterboard/gyprock)
Wall plugs (for gyprock/plasterboard) or rawl plugs (for plaster)
Screws (strong enough to support the artwork)
Picture hooks or D-rings (depending on the hanging method of your artwork)
Stud finder (optional but recommended for plasterboard/gyprock)
Ramset screws (for plasterboard if studs are not located)
Masonry drill bit (for brick/concrete walls)
Masonry plugs (for brick/concrete walls)
1. Measure Your Artwork
Width: Measure the width of your frame and find the center point.
Height: The center of the artwork should be around 145-150 cm from the floor for eye level.
Above Furniture: If hanging above furniture, make sure the bottom of the artwork is about 15-25 cm above the furniture.
2. Mark the Wall
Use a measuring tape and pencil to mark the center of the wall where the artwork will hang.
Mark where the screws or hooks will go, based on the distance from the top of the artwork to the hanging hardware (wire or D-rings).
Hanging on Plasterboard/Gyprock Walls (With or Without Timber Framing)
3. Locate Timber Studs (If Available)
Use a stud finder to locate the timber studs behind the plasterboard or gyprock. This will give you the most secure place to hang your artwork, especially for heavier pieces.
Mark the center of the studs on the wall.
4. Drill Holes
If studs are located: Drill holes directly into the timber studs using the appropriate drill bit.
If no studs are available: Use ramset screws or wall plugs (plastic anchors). For ramset screws, drill the appropriate hole size and insert the screw into the plasterboard.
5. Insert Screws or Hooks
Insert screws into the studs or wall plugs. Leave a small gap for hanging your artwork.
For D-rings, screw in the screws until they are snug and able to hold the D-ring firmly.
For wire, install screws just high enough to support the wire.
6. Hang Your Artwork
Hang the artwork by placing the wire or D-rings onto the screws or picture hooks.
Use a level to ensure the artwork is straight.
Hanging on Plaster Walls (Solid Plaster)
3. Drill Holes into the Wall
For solid plaster: Drill small pilot holes into the wall using a masonry drill bit. Make sure to drill deep enough for the rawl plugs or masonry plugs.
4. Insert Wall Plugs
Insert rawl plugs (for plaster) or masonry plugs (for solid plaster or concrete) into the drilled holes.
5. Insert Screws or Hooks
Insert screws into the plugs, leaving a small gap for hanging your artwork.
For D-rings, screw in the screws firmly.
For a wire, install screws just high enough to support the wire.
6. Hang Your Artwork
Hang the artwork by placing the wire or D-rings onto the screws or picture hooks.
Use a level to ensure the artwork is straight.
Hanging on Brick or Concrete Walls
3. Drill Holes into the Wall
For brick or concrete, use a masonry drill bit to drill holes in the wall.
Make sure to drill deep enough for masonry plugs.
4. Insert Masonry Plugs
Insert masonry plugs into the drilled holes to secure the screws.
5. Insert Screws or Hooks
Insert screws into the plugs, leaving a small gap for hanging your artwork.
For D-rings, screw the screws into the masonry plugs securely.
For a wire, install screws just high enough to support the wire.
6. Hang Your Artwork
Hang the artwork by placing the wire or D-rings onto the screws or picture hooks.
Use a level to ensure the artwork is straight.
Important Safety Reminder:
Be cautious of electrical wiring: If you're unsure about the location of electrical wiring behind your wall, it’s best to call a professional who has the proper tools (like a stud finder or wire detector) to avoid accidents. This is especially important when drilling into gyprock, plaster, or brick walls.
Additional Tips:
Heavy Artwork: Use two hanging points to distribute the weight and ensure stability.
Safety: Always wear safety glasses and gloves when drilling, and be cautious of electrical wires or plumbing behind the wall.